Quantcast
Channel: Digital Forensics Today Blog
Viewing all 114 articles
Browse latest View live

Welcome to the EnCase Forensic Blog

$
0
0
Steve SalinasToday we are launching the EnCase Forensic blog.

You might say “why have another blog”, well I am glad you asked. First, while the EnCase Forensic product page has lots of great information about the product, it’s really not conducive to carrying on a conversation with the forensic community. On top of that, we wanted a place where we could talk about EnCase in a much more flexible environment. So this is how the EnCase Forensic blog was born. There will be a number of different topics discussed in this blog, from product releases announcements and future development plans to detailed “How-to” posts, highlighting how best to use a feature in version 7.

If you have suggestions for topics please feel free to drop me an line. Enough about the blog, let's get on with the show. Enjoy!


EnCase Forensic – A Development Perspective

$
0
0
Ken BasoreWith the release of EnCase v7.03, I wanted to highlight for you a few things that we have been working on over the past several months. Since the release of Version 7, we have heard from many of you that the processing speeds were not acceptable. In addition, we have heard from some of you that there were elements of the new user interface that did not make it easy for you to work your cases the way you prefer. Well, we have listened carefully to all of this feedback, and our Development team has worked hard to make Version 7 easier to use and more robust than any other product, including our own Version 6. With EnCase v7.03, we concentrated on several key areas that were either of concern to our users or could advance the product in important ways.
  • Evidence Processor Performance
  • Support for Text Indexing in Slack and Unallocated Space
  • Compressed review of Search hits
  • Additional Artifacts including attached USB devices and mounted network shares
With respect to the first item, we looked at many different types of evidence and found certain areas where we could optimize how EnCase handles the vast amount of data that can be generated during processing. We changed how some data was stored, as well as how often EnCase reads from certain data files, and when we were done v7.03 processed the same evidence 2 – 3 times faster than v7.02. When you add in that EnCase now also indexes slack and unallocated space, the improvement is even more substantial, and users can now expect processing to complete much faster.


Although processing 2 – 3 times faster than v7.02 is certainly solid progress, we were also interested in how v7.03 compared to other products. Using a system identical to our recommended computer system, we ran several different data sets through EnCase v7.03 and through the new release of a competitor’s product. As you can see from the below table, in addition to being 2 – 3 times faster than Version 7.02, EnCase v7.03 also performed at least 2 times faster than the competitor’s product.

Test Set
Entries
Device Size (GB)
EnCase
Processing Time (hh:mm)
Items indexed
EvCache
size (GB)
Competitor’s Processing time  (hh:mm)
Items indexed
EvCache
size (GB)
Test Ev 1
10,731
232.83
01:41
31,189
3.82
4:22
28,121
6.85
Test Ev 2
110,069
232.83
02:52
423,741
16.9
77:57
420,450
20.5
Test Ev 3
761,775
298.09
15:12
1,005,015
27.2
29:17
909,448
53

In order to make the comparison as “apples-to-apples” as possible, we used the two products with the same settings (if available), as follows:

Settings
EnCase
Competitor’s Product
Base Modules
Recover Folders
Enabled
Enabled
File sig
Enabled
Enabled
Protected file analysis
Enabled
No option
Thumbnail creation
Enabled
Enabled
Hash analysis
MD5, SHA1
MD5, SHA1
Compound files processing
Enabled
Enabled
Find email
Enabled
Enabled
Find internet artifacts
Enabled (no Unallocated)
IE Only
Indexing
Slack\Unallocated Clusters enabled
Min word length: 3
Max word length: 64
East Asian support enabled
Unallocated Clusters on
Max word length of 64
No East Asian script support
“Index All”
Additional Modules
System Info Parser
Enabled; default settings
n/a
IM Parser
Enabled; default settings
Yahoo only (via data carver)
File Carver
Enabled; default settings
n/a
Win Event Logs
Enabled; default settings
evt, evtx only
Win Artifact Parser
Enabled; default settings
Link files only
Unix Login
Enabled; default settings
n/a
Linux Syslog parser
Enabled; default settings
n/a

We always encourage and welcome testing. If you conduct your owns tests and are able to share the results, we would love to hear from you. No two evidence files are exactly alike, and there may be additional enhancements we can make based on certain types of data that we may not have in our test sets.

Although we are encouraged by the improvements that we have made, we are continuing to look at ways to make the critical step of evidence processing faster, while giving examiners access to even more data. We know that with the new caching that was instituted in Version 7 (in order to alleviate memory constraints), I/O speeds are an important limiting factor, as a lot more data is written to disk and read in when needed. This new caching approach enables EnCase to scale almost infinitely, but we will continue to optimize file storage and hardware configuration so that EnCase maximizes the I/O and is not constrained by one or two data channels. This will enable EnCase to utilize system memory and processors more efficiently, instead of having the processors wait to read/write data. This will continue to be a priority for EnCase v7.04, as we continue to make improvements that are the most meaningful to our users.

As all of you know, in addition to the evidence processor, Version 7 also included significant changes to the user interface. The UI had not drastically changed since Version 1, and based on a lot of customer feedback, we knew it was time to overhaul it. We talked to many users about what they wanted in a new UI and how they used the program in their daily work. We then came up with a design that we believed met the majority of the requirements expressed by users, and did so in a manner that would allow both less experienced and longtime users to operate in efficiently.

Although we talked to many users and obtained feedback on prototypes, we realize that we did not account for certain common workflows used by investigators. We know that a few of the changes (especially how compound files are mounted, tagging vs. blue checks and reviewing search hits) have been difficult for longtime users to get used to, but these changes were necessary to allow for the speed, flexibility and scalability that you require. Even so, we realize that if you can’t get your work done, all the speed, flexibility and scalability in the world won’t make a difference. We have listened to your feedback and are adding features like these in the next few months that will enable more varied workflows:
  • Hyperlinking to exported files in reports
  • Adding more fields into reports, including options that were available in v6
  • Ability to refresh search results during a processing
  • Allow users to do operations like copy/unerase, export and bookmark based on a tag
In addition to the performance enhancement and UI changes, we are continuing to innovate by adding new functionality that is not available elsewhere. For example, in Version 7.03 we added the ability to create one or more “Review Packages” that can be sent to a case agent, prosecutor, colleague, or anyone who has a vested interest in your case. These Review Packages can be opened in Internet Explorer and enable the reviewer to tag items and add comments that can then be easily assimilated back into the examiner’s case. This feature, which is part of the standard EnCase install, enables users to easily share evidence with those who need to look at it; we hope that you find that it will enable you to get work done more efficiently.

In conclusion, I want to let all of you know that we have been listening to your concerns and suggestions about the software and we have been working hard, making changes to give you the tool that you want and need. We will continue to listen, continue to make improvements, and continue to innovate, as we work to meet the needs of our user base that has worked with us for many years to improve the tools available to investigators.

Ken Basore
Vice President, Research & Development
Guidance Software, Inc.

What's the EnCase Processor?

$
0
0
Steve Salinas Last week I sat in on an EnCase® Computer Forensics I class held here in our Pasadena Training Center.

It was a great class, nice mix of students from law enforcement, corporate, and consulting organizations. As the class began the lessons on the Evidence Processor, the instructor asked the students if they had ordered their free EnCase Processor yet and to my surprise more than one student asked "What's the EnCase Processor?"

Seeing this firsthand I thought I'd better take a couple of minutes and explain the new EnCase Processor product and let you know how you can order yours today. All EnCase Forensic v7 licenses now include an EnCase Processor dongle so if you purchased v7 in after v7.03 was released you probably already have your EnCase Processor dongle. If you purchased EnCase Forensic v7 before v7.03 was released you just need to fill out a short form to get your free dongle, but I am getting ahead of myself. Back to the task at hand, explaining the new EnCase Processor product.

The EnCase Processor is a standalone evidence processor designed to allow forensic examiners to offload the acquisition and processing of evidence to another computer, freeing up their forensic workstation for casework. Since EnCase Forensic v7 includes an evidence processor already, now you are essentially doubling your processing capacity. The capabilities of the EnCase Processor are the same as the evidence processor in v7 with one additional capability; smartphone acquisition and reporting.

To read about what you can do with the EnCase Processor download the EnCase Forensic v7 Essentials Manual. The manual is full of great information, including details about the different tasks you can automate with the EnCase Processor. As I mentioned, to order your free EnCase Processor take a couple of minutes and fill out the EnCase Processor order form. All you need to have is the physical address you want the dongle shipped and your EnCase Forensic dongle ID. To make it easier, if you have several EnCase Forensic dongles you can fill out the form once and enter all the dongle IDs together, providing you want the Processor dongles shipped to the same address.

Be sure to keep your eye out on this blog for more information about the processor as well as the other new features of EnCase Forensic v7. As always, any questions or comments please let me know.

Passware Kit Forensic - Now Available for Purchase

$
0
0
Steve Salinas During the v7 roadshow last year one of the most talked about new features was our Passware integration. The question I heard over and over was "Can I buy Passware from Guidance Software?". At the time unfortunately you could not but I am glad to say that now you can. Before getting into how you can purchase the product, let's talk a little about our integration and what exactly you can do with Passware Kit Forensic.

With EnCase® Forensic v7 you can perform protected file analysis in the evidence processor. Using Passware's Encryption Analyzer, EnCase will identify encrypted and password-protected files. Once protected file analysis is complete, you will be able to see what files are protected as well as the complexity of the protection, pretty cool stuff.

To do what I have briefly described you do not need a license for Passware, this capability is part of v7, no strings attached. However if you want to take the next step and actually decrypt the files you do need the Passware Kit Forensic product, which you can now purchase directly from Guidance.

For those of you not familiar with this product, Passware Kit Forensic is a complete encrypted evidence discovery & decryption solution for computer forensics. It recovers or resets passwords for more than 200 different types of files, as well as decrypts hard drives, PGP archives, and unlocks Windows and Mac accounts. Complete with FireWire Memory Imager, Passware Kit Forensic is the first and only commercial software that decrypts BitLocker, TrueCrypt and FileVault hard disks, and instantly recovers or bypasses Mac and Windows login passwords of seized computers.

The latest version of Passware Kit Forensic, v11.3 includes the following capabilities, to name a few:

• Decrypts 200+ file types
• Decrypts FDE: TrueCrypt, BitLocker, FileVault and PGP
• Recovers Mac user passwords
• Acquires and analyzes live memory images
• Distributed and Cloud Computing acceleration
• Hardware acceleration: NVIDIA & ATI GPU, TACC, multi-cores

As Dmitry Sumin, President of Passware, Inc. said, “Encryption is becoming a major obstacle for digital investigations. We are excited to provide EnCase customers with an efficient solution that significantly reduces decryption time and thus allows investigators to focus on data analysis.” By the way, if you don't already follow Passware on Twitter, you should.

Dmitry and his team have been great to work over this past year and we look forward to providing further integration in the future.

Parsing Internet Information from a USB Thumb Drive

$
0
0
James HabbenThe EnCase® Evidence Processor has some great features, but did you know that it can also parse Internet history and bookmarks from a USB thumb drive? Today we will look at forensic artifacts from the use of Mozilla Firefox and Google Chrome web browsers used from the PortableApps.com framework.

First, let’s have a quick intro on the framework. The project was originally created to make a version of Firefox that was able to run solely from a USB thumb drive. It required a computer that was running Windows®, but it did not need Firefox. The thumb drive carried the application and stored all the history, bookmarks, and settings back onto the thumb drive. This setup allows privacy, secrecy, and convenience. Today, the PortableApps.com framework allows for a ton more applications to be run in a portable configuration.

To use the framework, you simply download the installer from the PortableApps.com website. Run the installer and point it to your thumb drive. This installs the framework, but no applications. Here is what the application launcher looks like.


In some Windows versions, this can be set as an autorun application, but Windows 7 has disabled the ability to autorun from a USB device.


To get Firefox and Chrome, you need to download and install them through the Apps button > Get More Apps… option. Scroll down to the Internet section, and you will find the two applications.

Click Next to start the download. You may have to check the typical “agree” boxes. When finished, the browsers will show in the menu.


Now it is time to have some fun. Use these browsers to explore the “interwebs.” Dare yourself to go to sites that you have never seen before. You might find a new hobby!

Once you have tired yourself out, shut down the browsers, and let’s see what kind of mess we made. If you decided not to be adventurous with your own portable browsers, you can download my sample here.

Open EnCase® v7. Firefox has been supported since EnCase® v6 dot-something, but if you want to see the Chrome stuff, you will need a minimum version of EnCase v7.3. Create a new case using the #1 Basic template. Fill in the information and choose a location that works for you.


Add a preview of the drive that has the portable apps. There is no need to disconnect and use a write blocker since this isn’t a forensic case, but feel free if you like. Click on the device name to have EnCase parse the file system.

The structure of the framework places the application and its settings inside a folder under the [root]:\PortableApps folder. In this drive we only have the FirefoxPortable and GoogleChromePortable folders added. You will also notice that they each have a consistent list of folders under them: App, Data, and Other.


The App folder holds settings that are related to the PortableApps.com framework. It contains icons, executables, and other files related to launching the application.

Once the application is running, the settings for the user actions are stored inside the Data folder. If you are familiar with the Firefox storage structure and artifacts, you will be at home inside the [root]:\PortableApps\FirefoxPortable\Data\PROFILE folder. In there, you will find files, such as cookies.sqlite or places.sqlite, which are used to store the artifacts we are after. One storage area that you will not find in the portable version is the web cache.


If you are interested in the full range of forensic artifacts available, we offer a course titled EnCase® Advanced Internet Examinations. What we are after in this posting, is the fact that the EnCase Evidence Processor can recognize the forensic artifacts of both Firefox and Chrome when used in the PortableApps.com framework.

Use the Add Evidence drop-down menu and choose the Process Evidence… option. For the purpose of this posting, deselect everything except the Find internet artifacts option. Then click OK.


The results show in the Records tab. There will be an Internet folder with an item inside labeled “Internet” as a hyperlink. Click on the name to open the data.


Once inside, you will see three main folders. The Chrome (Windows) and Mozilla 3 (Windows/Mac) are the folders of interest. The Mozilla (Windows/Mac) is created because there is a file created by PortableApps.com that resembles the Firefox v2 and lower bookmark storage, though it isn’t used as such.


Take a look in the History folder of the Mozilla 3 artifacts, and you will see all the sites that have been browsed on this portable version of Firefox. You will have to scroll to the right to find the Url Name column to see the URL that was browsed.


You will also see the bookmarks that have been made using the portable version.


Take a look inside the Chrome folder and you will see all of the same types of artifacts.


Hope this helps you in your cases!

v7 Training Update - New Classes Available

$
0
0
Steve SalinasAs you probably know we have been conducting an EnCase Forensic v7 Survey for a few weeks now. To date near 600 surveys have been submitted. If you haven't submitted yours yet, please take a few minutes and complete the survey. This is a great opportunity for you to let us know how v7 is working for you and how we can make the product better meet your needs. Reviewing the survey responses it became clear to us that in addition to making enhancements to the product many customers were looking for more v7 training options. Today I want to introduce you to two new v7 training options, both developed to help v7 users get the most out of EnCase.

EnCase v7 Transition
This class is for customers who have previously completed EnCase Computer Forensics II (or higher level class) or who are EnCE certified and are upgrading from a previous version of EnCase. Through a series of hands-on scenarios our instructors will walk users through the new workflow in v7, from case creation to archiving, paying special attention to the areas and capabilities of v7 that are significantly different from v6. The first three-day course will be offered at our Pasadena Training Center in June with additional classes scheduled at our training locations through the end of the year. Check the course schedule for more information.

EnCase Computer Forensics I v7 OnDemand Training
This on-line course involves practical exercises and real-life simulations, providing students with an understanding of the proper handling of digital evidence from the initial seizure of the computer/media to acquisition, and then progresses to the analysis of the data. It concludes with archiving and validating the data.
OnDemand training is a great option for users who cannot find the time or the budget to travel to one of our training facilities. With OnDemand you can complete the curriculum at your own pace, anywhere, anytime.

I'm pleased to announce these new training options for our v7 users. If you have any questions about prerequisites, price, availability, please contact your sales representative.

Finally, if you haven't taken a look at the EnCase Essentials v7 free training close this blog, lock your door, turn your phone off, and do it now. Kidding aside, this is a free four-hour training that will give you the basics of v7, from start to finish. There is also a companion manual for the training that you can download; it is a great reference guide to keep handy when working with v7. Did I mention the training is free?

As always, any questions, feel free to contact me.

EnCase Forensic v7.04 Releasing Today

$
0
0
Steve SalinasToday we are releasing EnCase Forensic Version 7.04. For those of you who are v7 customers you should receive notification from us very soon, if you haven't already.

In v7.04 we have made further enhancements to the evidence processor, improving the performance of keyword searching, finding email, and the file carver to name a few. We have also added a new case backup and recovery option to help you ensure your investigation will be available when and where you need it. There are plenty of other enhancements in this version so please check the release notes for all the details. In the meantime you can check out this short video, where I walk through a few of the features and new capabilities in v7.04.

For those of you attending CEIC in a couple of weeks, we will be using v7.04 in the v7 lab track as well as the the v6 to v7 upgrade session.

CEIC and EnCase Essentials v7 Training

$
0
0
Steve SalinasLast week at CEIC we ran four Upgrading EnCase v6 to v7: Who Moved My Cheese? sessions. The sessions were packed with EnCase v6 users who were looking to get past the obstacles that were preventing their full transition to v7. In total we presented to close to 200 attendees and had some really great discussion. By the end of the sessions I could see many of the attendees were ready to get going with v7.

During the process of walking the users through v7 I learned that that quite a few of the folks in each session had yet to view the free EnCase Essentials Training. One of the reasons many had not taken advantage of this free training was that they did not have ready access to the internet at work. Even those who knew about the training were forced to view it during their off hours, when they were able to connect to the internet.

The first thing I did when I got to the office this week was ask our training department to create an offline version of the essentials training and they did. Now anyone that wants to get the basics of v7 can download this offline format of the EnCase Essentials Training and view the lessons anytime, anywhere. In addition, we also updated the companion EnCase Essentials Training Guide, incorporating the changes made in the latest release of EnCase, v7.04. Be sure to download these two files when you get a chance and keep them handy.

On a related note I am planning a v6 to v7 webinar series where we will cover many of the topics that were presented during the CEIC session. Look for more information about this webinar series soon.


Using Volatility with EnCase

$
0
0
Mark MorganINTRODUCTION

Memory Analysis has come a long way and it is imperative that a good Incident Responder realize the valuable information that can be obtained in analyzing memory.

I have been conducting Incident Response investigation for a few years now and have always used Volatility as my tool of choice. I like it because first off it is open source and I have found it to be very user friendly in identifying possible malware and being able to understand the results that are being retrieved from memory.


As a consultant for Guidance Software’s Federal Sector I interact and train quite a few agencies on the deployment and use of Encase. I have been getting a lot of requests from agencies that have a young Incident Response (IR) team with little or no experience to incorporate memory analysis training in with the normal Encase training. In creating a training program for this I got to thinking how I can train a young team on how to use memory analysis tools with Encase. I have been using the "File Viewer" in Encase for quite some time to view different files with third party tools. So I decided to try this with Volatility and some "batch" scripts to come up with some training tools that can be used with EnCase. With that said I am going to go through how I created the batch scripts and how they work with the File Viewer in EnCase. My assumption going in is the user already has Volatility installed on their system. I will go into a little of how I installed Volatility but not in detail since there is a very good instruction on the volatility site which can be accessed at http://code.google.com/p/volatility/w/list. This process will only work if you import a raw memory image, not an E01 file.

INSTALLING VOLATILITY

To install Volatility I would suggest you go to the above listed site and browse over to the Wiki and look at the Full Installation for Volatility. Obviously you will need python, Distorm, and Pycrypto installed along with the latest version of Volatility. If you follow the instructions on the Wiki you should get it installed with no problem. The only thing I did different was that I did not use the SVN function. Instead I manually downloaded the latest version by going to http://code.google.com/p/volatility/downloads/list. From here I downloaded the Volatility 2.0.tar.gz and used the compression tool 7-zip to extract it to the root of my "c:" drive.

Once you have everything installed and volatility setup on your system you will need to ensure you also download the python script "malware.py." This script is not part of the default installation of Volatility but can be downloaded at http://malwarecookbook.googlecode.com/svn/trunk/malware.py. Once downloaded make sure you copy it into the plugins sub-folder in the Volatility folder. This script is a multi-script written by the author of "Malware Cookbook" and is free for distribution. To ensure the malware.py is working properly you will need to open a command prompt and run the following: python vol.py –h. You should see a listing of all plugins and the very first one should be "apihooks" with the word [malware] next to it. If you do not see that then something went wrong and you need to try it again. Now let’s move on to EnCase and the batch scripts.

FILE VIEWER

First let’s talk a little about how the File Viewer function works in Encase. This viewer is used to view files of any type that cannot be seen inside of Encase. It gives you the ability to point to a tool already installed on your local system and view the highlighted file from Encase. The way it works is Encase will copy the highlighted file out to the default temp directory and then launch the third party tool and view the file. Now the way it works for volatility is you set the file viewer up to launch the command prompt and give it some basic commands to make the command prompt stay open. Encase of course still needs to copy the highlighted memory image out to the default temp directory before running the batch script. Below is a sample of a file viewer setup for one of the multi-scripts:


As you can see the viewer is very basic. The Name is whatever you want to call the viewer; in this case I called it "ImageInfo" which is the name of the volatility plugin. In volatility 2.0 you need the profile of the image to run the plugins so this is the 1st plugin that must be run.

The application path is where we call the cmd.exe (command prompt) and the command line is telling the command prompt to open and stay open and then go to the batch files and run the imageinfo.bat.

So when you get all these setup then your File Viewer will look something like the following screen shot:


As you can see there is a folder called "Volatility" which holds the individual batch files corresponding to the volatility plugins.

BATCH SCRIPTS

I am not going to get into how to write a batch script as that would be for someone that is far better than me at script writing. The way I have this setup is the File Viewer in EnCase is given instructions to access a folder called "bat_files" that will sit in the root of your volatility folder. It would look like this: "C:\Volatlity-2.0\bat_files\". In this batch file folder will sit a batch file that corresponds with each plugin that Volatility currently has. I also have created 8 Multi-Script batch files that we will be using in EnCase. I have used the SAN Memory Analysis Cheat Sheet as a basis. The categories are as follows:

1. Identify Rogue Processes
2. Analyze Process DLLs and Handles
3. Review Network Artifacts
4. Look for Evidence of Code Injection
5. Check for signs of a RootKit.
6. Dump Suspicious Processes and Drivers
7. Registry Analysis
8. Timeliner

The "File Viewer" will launch a "command prompt" and then run the batch script requested. The following is a sample of one of the batch scripts I wrote:

@Echo off
cd \
cd Volatility\

echo DLLDUMP
::echo
::echo
echo Dump DLLs from specific processes.
::echo
::echo
echo Please enter the image profile for the memory image.
echo You should have gotten this from the imageinfo plugin
::echo
::echo
pause
:input
set INPUT=
set /P INPUT=Type input: %=%
if "%INPUT%"=="" goto input
::echo
::echo
echo Please enter the dump directory you want to use.
pause
:input2
set INPUT2=
set /P INPUT2=Type input2: %=%
if "%INPUT2%"=="" goto input2
pause
::echo
::echo
echo Please enter the REGEX pattern you would like to search for.
pause
:input3
set INPUT3=
set /P INPUT3=Type input3: %=%
if "%INPUT3%"=="" goto input3
cd \
cd volatility\
python vol.py --profile=%INPUT% dlldump -f %1 --dump-dir %INPUT2% -r %INPUT3%
::echo
::echo
pause
echo MODDUMP
::echo
::echo
echo Extract Kernel Drivers.
::echo
::echo
echo Please enter the Dump Directory you want to use.
pause
:input2
set INPUT2=
set /P INPUT2=Type input2: %=%
if "%INPUT2%"=="" goto input2
pause
::echo
::echo
echo Please enter the REGEX pattern you would like to search for.
pause
:input3
set INPUT3=
set /P INPUT3=Type input3: %=%
if "%INPUT3%"=="" goto input3
python vol.py --profile=%INPUT% moddump -f %1 --dump-dir %INPUT2% -r %INPUT3%
pause
echo PROCESSMEMDUMP
::echo
::echo
echo Dumps process to executable sample.
::echo
::echo
echo Please enter the dump directory you want to use.
:input2
set INPUT2=
set /P INPUT2=Type input2: %=%
if "%INPUT2%"=="" goto input2
pause
::echo
::echo
echo Please enter the PID info you would like to search for.
pause
:input3
set INPUT3=
set /P INPUT3=Type input3: %=%
if "%INPUT3%"=="" goto input3
python vol.py --profile=%INPUT% processmemdump -f %1 --dump-dir %INPUT2% -p %INPUT3%
pause
echo MEMDUMP
::echo
::echo
echo Dump every memory section into a file.
::echo
::echo
echo Please enter the dump directory you want to use.
:input2
set INPUT2=
set /P INPUT2=Type input2: %=%
if "%INPUT2%"=="" goto input2
pause
::echo
::echo
echo Please enter the PID Info you would like to search for.
pause
:input3
set INPUT3=
set /P INPUT3=Type input3: %=%
if "%INPUT3%"=="" goto input3
echo This completes this script. Please review your results and proceed to the next multi-script.

The first thing this script does is browse over to the default location of your volatility folder. If this is different, then you would need to change the location in each batch script. It will run, and then tell you what plugin it is about to run, and ask you for user input if needed. Once you input the imageinfo information then you will not need to do that again as the script knows what that is for the remaining plugins. Once all the user input is received it will then execute vol.py, and run the plugin.


The -f option tells volatility where the image is located and in this case the %1 tells it to run the highlighted image that was just copied to the temp directory. I have setup all the batch files to create a text file and place it in a temp directory located at "C:\temp\". Each text file will be named after the name of the batch script so if you do not want a text file then just delete that portion of the script. Below is how the temp directory will look after running the scripts.


As you can see by this batch script it will run a plugin and then ask you for certain information. So you will need to run these multi-scripts in a certain order so you have the required information for the scripts that require user input. I have labeled these scripts 1-8 inside of Encase so a user will know which order to run these scripts.

ENCASE INI FILE

So if you would like to use this process for your investigations or a way to learn volatility then I have placed the "Viewer.ini" file and the "bat_files" at https://www.dropbox.com/sh/f52w8cw9cfj1ewh/GWkHmnt7_m just copy the ini file to the default location for the Encase config folder. For Version 7 it is at C:\Users\morgan\AppData\Roaming\EnCase\EnCase7.03.0232-2\Config\. For Version 6 it is at C:\Program Files\EnCase6.19.4\Config\.

For the "Bat_File" just unzip that into the root of your volatility folder c:\Volatility\ and make sure you create a temp folder at the root of c:\. Once you have done all that then you are ready to go.

SUMMARY

I hope this was informative and helpful in some way to the readers and younger Incident Responders out there. The old dogs I am sure will have their opinions on this but I wrote this because I believe the Multi-Scripts are helpful in allowing a beginner to learn what plugins to run and what information is needed by other scripts. Version 7 allows a user or agency to create a module (Enpack) to be used on the Evidence Processor, so when you launch the Evidence Processor, if Volatility, or any other memory analysis solution were to be packaged in a module, there would be an option for Memory Analysis that would give the user the option of which plugins should be run. Thanks for taking the time to read this post and I hope this gave some insight of how powerful Encase can be.

Examining Volume Shadow Copies – The Easy Way!

$
0
0
Simon Key

INTRODUCTION

The Volume Shadow Copy Service (VSS) is a framework that allows volume-backups to be created while file system writes continue to take place.

Originally implemented in Windows XP and Windows Server 2003, VSS was expanded with Windows Vista, resulting in an additional Windows Explorer Previous Versions properties-sheet.

This properties-sheet allows users to recover previous versions of files that were backed‐up using VSS at the time when a system-restore-point was created or a backup was made by the Windows Backup application.


It is very important to understand the VSS operation and be able to examine VSS data created by the system as part of system-restore operations. As we shall see, it may enable us to recover data that’s been deleted by the user.

Mode of Operation

While it is not the intention of the author to explore the technical details of the Volume Shadow Service, it is important to understand the basic principles under which it operates.

Firstly, when forensic examiners talk about VSS, they’re usually referring to the block-level shadow-copies of a volume created by the System Restore feature of compatible Microsoft Windows® operating systems.

System Restore uses VSS to take these copies whenever a restore point is created. The default settings under Windows 7® are such that restore points are created every seven days as well as just before significant operating system events, such as the installation of application software or device drivers.

VSS and System Restore have been around for some time now and most forensic examiners appreciate the fact that volume shadow copies may contain valuable data, data that’s been previously deleted but that has been captured during the creation of a restore point.

That said, the way in which volume shadow copies work is often misunderstood.

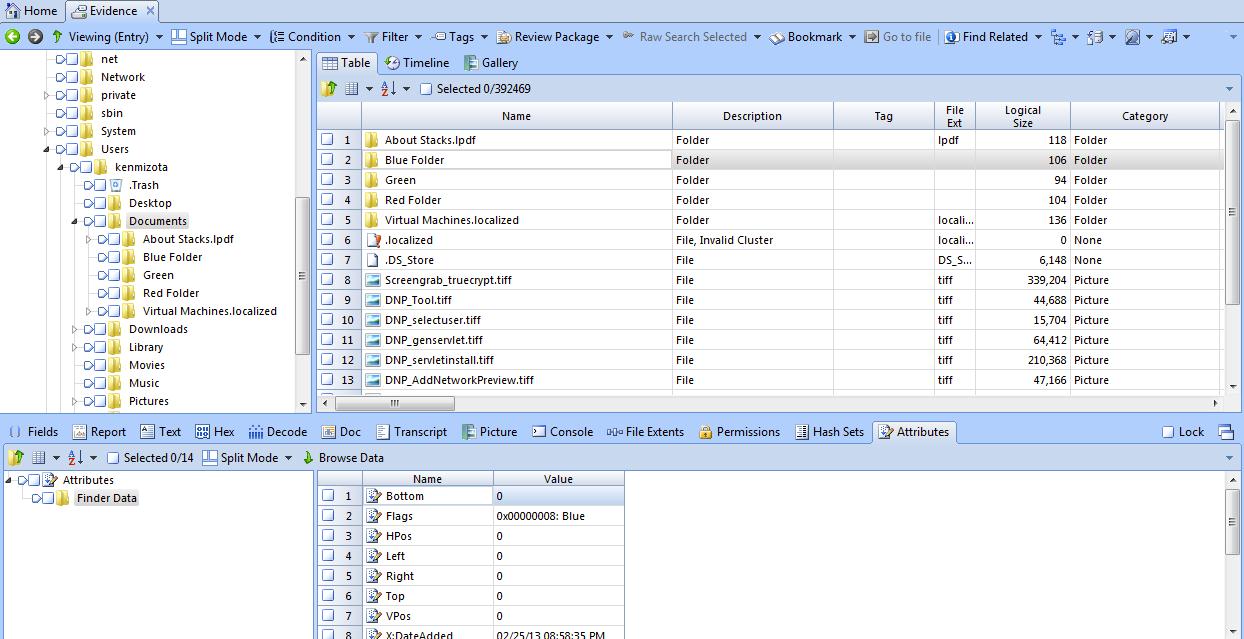
Many examiners think of a volume shadow copy as a logical, file or folder backup. They assume that the deleted files and folders that they are interested in exist within the rather large files maintained by System Restore in the System Volume Information folder. These files are highlighted in the following screenshot –


While these files may contain data relating to deleted files, to think of them as a location into which files and folders are put when they’re deleted is wrong. The reasons for saying this are as follows.

System Restore and VSS maintain differential or copy-on-write shadow-copies.

This type of copy works by monitoring changes to blocks on the volume in question. Any block that is about to be changed is backed-up to a differencesarea. By taking the unchanged blocks and the blocks in the differences area, a shadow copy of the volume can be constructed as it existed at a particular moment in time.

From a practical perspective, how would this apply to the deletion of a file, a picture perhaps?

Well let’s take the example of a file called passports.jpeg. We will demonstrate the recovery of such a file from a volume-shadow-copy later in this article.

If passports.jpeg resides on an NTFS volume, what will happen when the file is deleted by pressing SHIFT and DELETE in the Windows GUI?

Well the MFT record for the file will be modified to reflect the fact that it relates to a deleted file; the index entry relating to the file in the parent folder will also be deleted.

Other files, log files for instance, may also be changed but what happens to the clusters containing the file’s data on the NTFS volume?

Well nothing really, at least not until those clusters are reused by another file or folder on the volume.

So what data relating to passports.jpeg will be captured in the volume shadow copy files maintained by System Restore?

Well at a basic level, the only data that will be captured as part of the volume shadow copy will be the blocks containing the updated MFT record and the modified parent-directory data. The actual file-data itself will still exist in unallocated clusters. The blocks containing those clusters won’t be backed-up because they haven’t changed.

Note that we might recover passports.jpeg using file-signature and footer-based data trawling but this is not ideal for three main reasons
  • Not all files have an identifiable signature.
  • Files that are fragmented won’t be completely recovered.
  • Valuable file-system metadata such as paths, file-names, file-system attributes and created/accessed/last-written/entry-modified date/time stamps will be lost.


This leads us to conclude that the best and most complete way to examine a volume shadow copy is to treat it as, well, a volume.

So how do we access volume shadow copies as volumes? Well, that’s not too difficult at all.

Accessing Volume Shadow Copies

If we have an evidence file containing a volume whose shadow copies we’d like to examine, the best way is to use the Physical Disk Emulator (PDE) to mount the parent-disk and make the volumes that it contains available to Windows.

Using the Physical Disk Emulator (PDE)

We will use an evidence file called Peterson’s HDD to demonstrate the use of PDE and its application with regards to the examination of volume-shadow-copies. The Peterson’s HDD evidence file is a copy of a physical disk containing a single, Windows 7 system volume.

First we mount the disk using PDE.


For our host Windows operating system to recognize and give us access to the volume shadow copies of the volume contained in the evidence file we must make use of the PDE caching feature. This enables us to simulate read/write-access to the emulated disk.


Using PDE in this fashion results in our host Windows operating system enumerating the partitions on the emulated disk and mounting the single NTFS volume that it contains.

We can then right-click on the drive representing that volume (drive E in this case) and use the Previous Versions properties dialog to view details of the volume-shadow-copies that are available.


Notwithstanding the fact that the Previous Versions tab has an Open option that allows us to browse each shadow-copy (in read-only mode), we can use the vssadmin command-line tool to obtain a file-system path allowing us to access each volume shadow copy so that we can mount and/or acquire it. Note that the vssadmin command ships with any version of Windows that supports the Previous Versions feature.

Using vssadmin

The way in which we use vssadmin to enumerate the available volume shadow copies for a given volume is shown in the following screenshot.


As we can see, the command used to enumerate the volume-shadow-copies on a mounted volume is as follows –

vssadmin list shadows /for=:


The vssadmin tool provides information about each volume shadow copy including a path that can be used to acquire and/or mount it. The first volume shadow copy listed in the above screenshot has the following path –

\\?\GLOBALROOT\Device\HarddiskVolumeShadowCopy13


EnCase doesn’t currently support this type of path but other forensic acquisition tools do. We could use one of these tools together with the above path to acquire the volume shadow copy as a forensic image and then load it into EnCase.

While this approach facilitates the best-possible access to volume-shadow-copy data, it’s let-down by the fact that acquiring each and every volume shadow copy will take a lot of time and disk space. This problem is compounded by the fact that a lot of data will be duplicated across the volume and all of its shadow copies. Multiply that by the fact that a typical case will contain many volumes each having their own set of volume-shadow-copies and we have a big headache!

So let’s say that we need a quick and easy way to examine volume-shadow-copies to see if they contain files that we’re interested in. If we can identify those files by path, file-name, file-size and/or file-extension then our quickest approach will be to examine the contents of a volume-shadow-copy at a logical level: in other words, by searching through the contents of the volume shadow copy without acquiring it first.

The best way to do this is mount each volume-shadow-copy into an empty NTFS folder. We can then use any one of a number of manual or automated methods to recurse down through those mount-points and identify the files we’re interested in.

Mounting Volume Shadow Copies Using the mklink Command

Mounting a volume shadow copy can be accomplished using the mklink command-line tool, as shown in the following screenshot -


The above screenshot shows the mklink tool being used to create a symbolic link from the folder C:\VSS\Folder0 to the volume-shadow-copy with the afore-mentioned path.

Note several things with regard to the use of this command –
  • The folder-names VSS and Folder0 are arbitrary ones: any Windows-compatible folder-names can be used in their place.
  • The /d command-line switch must be used to signify a directory link.
  • The path to the volume shadow copy must be terminated with a back-slash character.
  • Whilst the folder C:\VSS must exist, the folder Folder0 must not: it has to be created by the mklink command.

    Creating this link gives us access to the contents of the volume-shadow-copy via the C:\VSS\Folder0 mount-point –


    We could mount any number of volume-shadow-copies from the PDE-emulated disk in this fashion but this methodology really comes into its own when used in an automated fashion. This leads us to the use of the VSS ExaminerEnScript.

    Using the VSS Examiner EnScript

    Overview

    The VSS Examiner EnScript is designed to make it relatively easy to find files that don’t exist as individual file in the current case but that are contained within volume shadow copies.

    The script does this by enumerating and then mounting all of the volume-shadow-copies for nominated volumes originating from a PDE-emulated disk.

    It then parses through all of the files in the current case looking for files that match the criteria specified by the examiner. These criteria can be based on a combination of file-name, path, file-size and file-extension.

    The hash-values of files in the case that match these criteria are compiled into a list and the script then recurses through the mounted volume-shadow-copies looking for files matching the same criteria.

    If a matching file is found, its hash is checked against the list of hashes for the files contained in the current case. If the hash can’t be found in the list then the file is added to a logical evidence file; the hash of the newly found file is added to the list and the search continues. If the hash of a matching file is found in the list then the file is skipped.

    Once the search has completed, all of the volume-shadow-copies are dismounted; the examiner can then add the resultant logical evidence file to the case.

    Versions of the VSS Examiner EnScript are available for EnCase V6 and EnCase V7. Both can be downloaded from the Guidance Software Inc. Support Portal.

    Practical Demonstration

    We will demonstrate the use of the VSS Examiner EnScript using the Peterson’s HDD evidence file, which we’ve already mounted in cached mode using PDE. That disk, if you remember, contains a single NTFS volume, which has been recognized by Windows and mounted as volume E.

    Having deleted the Folder0 mount-point that we previously created in the C:\VSS folder we run the VSS Examiner EnScript.


    The above screenshot shows the VSS Examiner EnScript configured as follows –

    • The script has been instructed to use the C:\VSS folder as the root VSS mount-point. The script will create a sub-folder in this folder for each volume-shadow-copy that it mounts.
    • Note that the script can be told not to mount any volume shadow copies automatically. In such cases it will assume that the examiner has already mounted the desired shadow-copies into this folder themselves.
    • The script has been told to restrict its activities to the volume shadow copies for the E volume. This is the volume from within our case that we made accessible via PDE.
    • The LEF output path specifies where to create the logical evidence file that will contain files located in volume-shadow-copies, those that don’t exist as files in our current case.

    The next step is to configure the criteria we wish to use to identify files of interest. To do that we click the Edit target file condition button. This allows us to specify our criteria in the form of a condition, an example of which is shown in the following screenshot –


    The condition shown in the above screenshot targets the following files –

    • Files with one of the following file-extensions –

      • jpg
      • jpeg
      • gif
      • bmp
      • png
      • txt
      • zip
      • rar
      • rtf
      • pdf
      • doc
      • docx
      • xls
      • xlsx
      • pdf
    • NTUSER.DAT Registry hive files located somewhere in the Users folder.
    • SYSTEM and SOFTWARE Registry hive file located somewhere in the Windows\System32\configfolder.

    The activities of the script can be monitored via the console window –


    The above screenshot shows how the script has successfully recovered a total of 28 files. These include a number of JPEG files, Registry files and a text file.

    We’re now in a position to bring the resultant logical evidence file back into EnCase.


    The above screenshot shows the contents of the logical evidence file produced by the VSS Examiner EnScript. In particular it shows a recovered JPEG file called passports.jpeg.

    It’s worth noting that not only has the file, its path and contents been preserved, the date/time stamps of the file have also been preserved.

    Note that it would be necessary to apply the same TZ and DST offsets to the logical evidence file as have already been applied to the source volume in our case. If we didn’t do this then the date/time stamps shown in our case wouldn’t reflect those having meaning to the person under investigation.

    Having identified files of note using the VSS Examiner EnScript, the examiner may decide to perform a full acquisition of the volume shadow copies in question. The LEF produced by the VSS Examiner EnScript includes the output of the vssadmin command so as to assist this.


    It’s worth pointing out that once the disk from the Peterson’s HDD evidence file had been mounted and the script configured, it took less than two minutes for the script to process three volume-shadow-copies of a 20-gigabyte volume. Not only that but it do so without creating anything other than a logical-evidence-file just 160-megabytes in size.

    Conclusion

    Data captured in volume-shadow-copies may be of great value to the forensic examiner and cannot be ignored.

    While the methodology documented in this article doesn’t provide full sector-by-sector, cluster-by-cluster copies of volume-shadow-copies, it does allow the examiner to quickly and easily triage such copies and recover files of particular note as identified by file-name, path, file-extension and file-size.

    The examiner may still resort to acquiring said shadow-copies should this be deemed necessary.

    Simon Key
    Master Instructor – GSI
    8th June 2012

EnCase v6 to v7 CEIC Session Recap

$
0
0
Steve Salinas

It is hard to believe CEIC 2012 was almost two months ago. Since CEIC we have been hard at work on EnCase, in fact recently we released an update to v7, v7.04.1. If you did not receive the email notification about this release you can request the software download links by registering your dongle. Look for another great update to v7 coming in the fall, v7.05.

As I mentioned a few posts ago, we are planning a v6 to v7 webinar series focused on helping users upgrade and get the most out of v7. This webinar series begins tomorrow so I wanted to share an abbreviated version of the v6 to v7 session that we held at CEIC as a bit of a teaser for what is to come. In this twenty minute video I cover the highlights from the CEIC session, from preparing hash libraries to using tags. Of course in this short video it is impossible to go into too much detail but hopefully this video can act as a primer for the upcoming v6 to v7 webinar series. If you stick around to the end of the video you will also get a quick preview of what we have planned for v7.05 and further down the road.

More v6 to v7 goodness to follow!

v7.05 Is Here!

$
0
0
Guidance SoftwareWe are excited to announce the availability of EnCase Forensic v7.05. This release contains many new improvements that we think you will enjoy. Let’s take a look at what is now available.
  1. Uncover Evidence Up to Nine Times Faster
    v7.05 is considerably faster than previous versions of EnCase Forensic. How fast you ask? Up to nine times faster! The following graph highlights the improvements that the evidence processor has made over time. With v7.05, processing large evidence files is not a problem.


  2. Make evidence available for analysis faster
    With prioritized processing, you can process a subset of evidence and make it available more quickly for investigator analysis. You can choose to continue or stop processing while completing your investigation.

  3. Improved search interface for index, keyword, and tag review
    The improved search interface gives you the ability to:
    • See a summary of tagged items and easily review each one independently or in aggregate
    • Ignore hits if they are irrelevant or you can choose to show multiple hits per item
    • View keyword search hits while EnCase is still searching

  4. Case Analyzer Provides Deeper Insight into a Computer System
    Case Analysis allows an investigator to see exactly what happened on a computer system. It provides higher level reports of metadata consisting of multiple artifacts joined together or specific pre-filtered data that would indicate activity on a system.

  5. Embed Hyperlinks in Exported Reports
    v7.05 gives you the ability to include hyperlinks to original documents and images in reports and offers updated report templates that display even more metadata such as dates, times, physical sector information for unallocated items, and hash values.

  6. Two new ways to filter evidence views
    In v7.05, you have the choice to filter in two ways:
    1. Filter the current table and stay in that same view with all the metadata available, or
    2. Filter across all pieces of evidence in your case and view the responsive items in the results view

  7. Ability to do more Operations from Search and Results
    You can now perform the same functions on items you locate through search as you can with entries. These functions include:
  • Exporting
  • Bookmarking
  • Keyword searching
  • Adding items to hash sets
Training

In order to help you transition to the new workflow of Version 7, we’ve created a free EnCase Essentials training session, which is available online. We also have a free four part webinar series that walks users through key parts of the transition, as well as a more detailed paid course called Transitions.

Tell Us What Your Favorite New Feature Is

We hope you’re as excited about v7.05 as we are. We encourage you to visit http://www.encase.com/705/ to learn more about this release and to download the v7.05 product brief. In the comments section below, tell us what your new favorite feature is. Your feedback is genuinely important to us.

Feature Spotlight: Embedding Hyperlinks in Exported Reports

$
0
0
Guidance SoftwareEnCase version 7.05 provides the ability to include hyperlinks to original documents and images in reports and offers updated report templates that display more metadata than ever before. View important metadata such as dates, times, physical sector information for unallocated items and hash values. Continue reading to learn how to include hyperlinks in your exported reports.
  1. In the Evidence tab, select the item you want to display as a hyperlink in the report.


  2. In the lower pane, click the Report tab to display metadata.


  3. Right click and select Save As from the dropdown menu. The Save As dialog displays.


  4. Select the Output Format you want. The supported formats are RTF, HTML, and PDF.
  5. Click the Export Items checkbox. If you want to view the report after saving, click the Open File checkbox.
  6. Accept the default path, or enter a path of your own, then click OK.
We want to hear from you!

Tell us what feature in v7.05 you like the most in the comments section below. Stay tuned for additional feature spotlights in the weeks ahead.

EnCase App Central is Just One Month Away!

$
0
0
Guidance Software
Guidance Software has developed a portal for EnCase customers to draw on the 40,000 user community for solutions. App Central will be a one-stop shop for users of the EnCase Forensic software to find add-on applications that enhance the effectiveness and efficiency of the software. For years, one of the most powerful and unique advantages of the EnCase software has been the EnScript programming language, which allows developers the ability to extend the functionality of EnCase with custom EnScript code. Dozens of apps have already been written in EnScript to help investigators who use the EnCase product solve cases more quickly. App Central will take those EnScript apps and community power and put it in one place for its users.

Guidance Software is encouraging its users to come to the App Central site to take advantage of both the free and paid apps that have been tested with the newest version of the EnCase software. Apps that solve fundamental issues for investigators like finding specific files or evidence, automating time-consuming tasks, or simply uncovering evidence that other investigators in the community have found useful will be available….and in most cases, for free. App Central is the next phase of Guidance Software’s commitment to helping Encase users get the most from their software.

Feature Spotlight: Direct Network Preview

$
0
0
Guidance SoftwareEnCase Version 7.06 introduces a new built in ability to perform remote forensics. If you are unfamiliar with the term “remote forensics”, take a moment to review the Gartner Remote Forensics Report for 2012. EnCase Forensic Version 7.06 brings remote forensics to the standard in digital investigations, and enables forensically sound investigation of live devices. In this post, we’ll walk through how to perform a network preview, and we’ll discuss some of the key differences between remote investigation in EnCase Forensic and EnCase Enterprise.
  1. First, if you have not done so already, Generate an Encryption key from the EnCase Forensic Home screen. A wizard will appear to walk you through the process.
  2. The next step is to generate a servlet. The EnCase Examiner will create a lightweight program, called a servlet, to be installed on the target machine to be investigated. The servlet will enable secure, encrypted communication between the target machine and the EnCase Examiner. In the Tools menu, select “Create Direct Servlet”
  3. Servlets must be associated with a specific user/Encryption Key. A list of users will appear with the users/Encryption Keys that are available to the EnCase Examiner. Select the user/Encryption Key created in the first step.
  4. EnCase Forensic supports a wide variety of operating systems for remote investigation. In this example, we’ll choose the Macintosh OS X type, since we’ll be investigating a MacBook Pro. Click “Finish” and the servlet will be created in the specified directory.
  5. The Servlet installer should be copied to the target machine and executed. The servlet can also be executed in a command line for use in a single session. The screenshot bellows illustrates the Servlet being installed on the MacBook Pro.
  6. Once the Servlet is installed, collect the IP address from the machine. Back in EnCase, within the “Add Evidence” tab, click “Add Network Preview”.

  7. Click “Direct Network Preview” as noted below.

  8. EnCase will present a list of users. This time, EnCase will prompt you for a password since we are attempting to access the remote device.
  9. Once the password has been entered, EnCase asks for an IP address, port and whether or not you’d like to acquire physical and process memory.
  10. The remote device is accessed, and the Servlet enables selection of the specific device to be previewed. In this example, we’ve selected the logical volume running on this MacBook Pro. Mounting logical volumes on a running OS X device is a new feature of Version 7.06 that we’ll cover in a subsequent post.
  11. Once we’ve clicked through, we navigate to Evidence and we can begin our examination of the remote device, just as we would any other device in EnCase.
As you can see, remote forensics is a powerful addition to the investigators toolkit, and it is available today, out of the box in EnCase Version 7.06.

If you are considering remote forensics with EnCase Enterprise or EnCase Forensic, here are a few of the key differences between the two versions.

Capability
EnCase Forensic
EnCase Enterprise
Remote forensics: One connection at a time
Yes
Yes
Remote forensics: Multiple concurrent connections
No
Yes
Quickly sweep ranges of devices
No
Yes
Centralized user account management
No
Yes
Comprehensive user event logging
No
Yes
Robust “check-in” connectivity support
(VPN user, mobile user)
No
Yes

We hope you find the new remote forensics capability valuable and welcome your feedback in the comments below or on the Guidance Software Technical Support Forums.


Numbers May Not Lie, But The AccessData Report Is Far From The Truth

$
0
0
Ken MizotaKen Mizota, Product Manager, Forensic Solutions

A little over a year ago, back in March 2012, in a previous EnCase Forensic blog post, “A Development Perspective,” we discussed the improvements that we had made to EnCase, including evidence processing speeds and the comprehensiveness of the indexed results. Now, AccessData, after waiting over a year, has conducted testing at its facilities on its equipment (nominally conducted by an “independent” third party, Opus One), and has issued a report (the “AccessData Report”) which I’ll address in detail, below. The AccessData public relations campaign over the last few weeks calls to mind the famous quote from Mark Twain:
There are three kinds of lies: lies, damned lies, and statistics.
As an initial matter, we regularly conduct benchmark testing of EnCase versus competitive products, and in all our testing have never seen test results anywhere near what AccessData claims. On the contrary, EnCase consistently processes data faster and is more comprehensive in its processing. We have also heard from third parties who have conducted their own testing and confirm our results. So how could AccessData make such outrageous claims? Five things stand out:
  1. First, the AccessData Report doesn’t address fundamental questions that affect performance, such as: was 32-bit or 64-bit EnCase used? (they will have dramatically different performance.) Were extra “remote processing nodes” used with FTK, or was it just the examiner? Were there non-standard registry configurations made by AccessData technical staff? Indeed, an even more fundamental question might be: did it take them 13 months to find a few data sets which favored them? For instance, FTK does not support Unix Login or Syslog for Unix or Linux data sets, and, conveniently, those features were not required for the data sets used.
  2. Second, AccessData refused to use EnCase-recommended settings. For instance, the indexing maximum word length was set to a non-EnCase recommended setting. Even though the default word length setting in EnCase is 64, the AccessData testing deliberately decided to use the AccessData preferred setting. Similarly, the AccessData Report did not provide any settings for Win Event Logs or Win Artifact Parser.
  3. Third, AccessData’s hardware choices were unrealistic for most computer forensics investigators. We conduct our testing using hardware that meets the minimum recommended configuration for both EnCase and FTK, on the premise that forensic investigators typically don’t have thousands of extra dollars available for server-class, high-end hardware. Further, independent, third party testing by a leading forensic systems integrator confirms the responsiveness of EnCase Forensic in reasonably priced computer systems in a recently released report. The AccessData Report, however, details that their testing used hardware well beyond the recommended levels. Not only is the configuration unrealistic, but more than likely, unattainable for the majority of digital investigators.1 What’s worse, the AccessData Report assumes that a forensic investigator has an extra high-end machine available to dedicate solely to processing data – with all of the cores occupied by AccessData’s processing, a forensic investigator can do nothing else (for instance, work on a report) on that machine until processing completes. EnCase Forensic, on the other hand, is designed so that processing can be accomplished quickly, while the machine can also be used at the same time for other forensic work.2
  4. Fourth, the testing was of old versions of both products – version 4.2 of FTK (they are now on Version 5) and Version 7.05 (actually, the report is ambiguous on this point, but it seems to be referring to 7.05) of EnCase (the current version is 7.07). We continuously make improvements to the processing engine that we have developed and control; in contrast, AccessData licenses its capabilities from a third party, so it does not have the ability to make improvements to it.
  5. Finally, and perhaps most importantly, the AccessData Report ignores the most important topic of all: the comprehensiveness of the processing and indexing of data. Our testing showed that EnCase indexed more items than FTK which means that a search of an FTK index could miss evidence that may be crucial to your case. For instance, EnCase provides full indexing of all data, including the outputs of any Evidence Processor module (e.g., Yahoo IM artifacts, Firefox artifacts, etc.); this is a clear difference between the two products. In addition, EnCase handles East Asian words appropriately, using language-specific word-breakers. Looking at file carving, EnCase provides support for 314 file types, whereas FTK provides support for 42. And, as previously mentioned, EnCase supports Unix Login and Syslog. Bottom line: the AccessData Report ignores the quality of the results, which is the most important factor to a professional investigator.
As we have stated many times, we welcome testing, because we believe it ultimately makes our product better, makes the industry better, and serves the user community. But in order for testing to serve those goals, it must be conducted fairly and transparently, not as a PR stunt or marketing charade. One of the great things about our industry is that it has always had a rigorous, almost scientific focus on repeatability, on transparency, and on quality. We look forward to continuing that tradition in our software development, our product testing, and our communications with the forensics community.

I hope to see many of you at CEIC in a few weeks, and would love to discuss the topic of testing with you there. In the meantime, if you have test results you’d be willing to share, please send them our way.


1 In addition, a simple comparison of the configuration specified for the “16 Core Configuration” in the AccessData Report shows that they grossly understate the street price of the hardware specified: they provide an estimated price of $11,000, but a comparison on a forensic hardware vendor’s website indicates a price closer to $15,000

2 For large labs or evidence processing “factories,” we offer other products that distribute processing with the expectation that the high-end hardware used there will be solely dedicated to processing data.


Unbiased Testing Confirms: EnCase® Forensic is Fastest

$
0
0
Ken MizotaKen Mizota, Product Manager, Forensic Solutions

Well, that didn’t take long.

A genuine, independent third party, Digital Intelligence, a company recognized and respected in the forensic community and a reseller of forensic-specific solutions, including EnCase® Forensic and AccessData’s Forensic Toolkit (FTK) software, recently published the results of its testing of both FTK and EnCase Forensic.


As true, independent testing:
  • Digital Intelligence was not compensated by either vendor
  • The tests were conducted by Digital Intelligence at its facilities and on its forensic hardware
  • The testing was independently conducted by Digital Intelligence and Guidance Software (and, we presume, AccessData) provided no technical advice or assistance.
As a matter of practice, Digital Intelligence conducts this type of testing in order to help forensic customers understand the optimal system configuration for each solution. A by-product of this systems testing is a relative view into processing performance for each application on a given configuration, as the same data set is used across products. Both Digital Intelligence reports are available on its website now for the forensic community to view and evaluate:

Digital Intelligence EnCase v7 Report

Digital Intelligence FTK 4.0 Report

EnCase Forensic is faster on all system configurations

I hope to see many of you at CEIC in a few weeks, and would love to discuss the topic of testing with you there. In the meantime, if you have test results you’d be willing to share, please send them our way.

A summary from the “final results” section of the two reports provides a fascinating comparison of processing speeds:

Processing time
Economy Machine
Mid-Range Machine
High-End Machine
EnCase
5.92 hours
5.73 hours
5.17 hours
FTK
9.08 hours
7.73 hours
5.38 hours

EnCase Forensic outperformed on all configurations – indeed, EnCase running on an “Economy” machine provides about the same performance as FTK running on a “High-End” machine. What’s more, FTK is designed under the assumption that a forensic investigator has an extra high-end machine available to dedicate solely to processing data – with all of the cores occupied by AccessData’s processing, a forensic investigator can do nothing else (for instance, work on a report) on that machine until processing completes. EnCase Forensic; on the other hand, is designed so that processing can be accomplished quickly, while the machine can also be used at the same time for other forensic work,1 so it is both faster and more versatile.

Better, Faster, Cheaper

Speed is just one factor used in evaluating forensic software. Other factors, such as comprehensiveness and total cost of ownership, are important as well. Not only is EnCase faster and more comprehensive – as detailed in a previous blog post, EnCase provides full indexing of all data, including the outputs of any Evidence Processor module (e.g., Yahoo IM artifacts, Firefox artifacts, etc.), it handles East Asian words appropriately, and supports file carving for 314 file types, compared to 42 for FTK – but it is also, following FTK’s recent price increase (and software maintenance hike to 30% of the license price), significantly more affordable. In fact, FTK’s license and first-year maintenance price of $5,200 is 44% higher than EnCase’s license and first-year maintenance price of $3,600. Of course, FTK requires significantly enhanced hardware, as well, so its total cost of ownership is even worse.

EnCase Forensic has consistently been the tool investigators rely on to find more evidence, faster. Each new version of EnCase adds valuable technology, like smartphone examination capabilities, without increasing license or maintenance costs. In addition, an independent third party has confirmed the true performance advantage of EnCase over FTK.

We will continue to encourage the types of independent testing that Digital Intelligence performed. And we will continue to make improvements to the processing engine that we have developed and control, so that we can deliver better performance to meet the needs of the forensic community.

1 For large labs or evidence processing “factories,” we offer other products that distribute processing with the expectation that the high-end hardware used there will be solely dedicated to processing data.

CEIC Caption Contest

$
0
0
Guidance SoftwareSubmit your caption for this cartoon! The caption with the most votes will win an Apple iPad! Winner will be announced June 10, 2013. Be original and have fun! Enter on our Facebook page.

Attendance at CEIC is not required to participate so join in!


The Road to CEIC 2013 – Digital Forensic Lab Focuses on Automation

$
0
0
Jessica BairThe “Road to CEIC 2013” is a series of blog posts on all things CEIC, before, during, and after, from an insider’s point of view.

For each release of EnCase®, I re-write the free EnCase Essentials course manual, a resource for getting started with EnCase® products. The past few weeks, I’ve had the opportunity to alpha and beta test the upcoming EnCase® Forensic v7.07 software while working on the manual update. As part of the beta testing, I have had the chance to work with the development team and Ken Mizota, product manager, who is dedicated to making EnCase Forensic more efficient, easier to use and incorporate new forensic features.

EnCase Forensic v7.07 will certainly measure up to Ken’s goals and you will be able to have hands-on training with this latest EnCase version in the CEIC Digital Forensics Labs. For example, there are exciting new capabilities in the EnCase Processor. I highly recommend you attend the Making the Most of EnCase Processor lab with Ken and Gary Brown if you use EnCase Forensic to process large amounts of digital evidence.

Custom Analysis with EnCase Forensic v7

For those who use EnCase® Portable and/or the Sweep Enterprise EnScript® for EnCase® Enterprise to collect evidence, you really need to check out Custom Analysis with EnCase v7, again with Ken and Paul Shomo. Paul has spent countless hours with Guidance Software instructors and customers to understand which metadata and registry keys are important to examiners and investigators and why. He then built many report templates to automate reporting and analysis; and took it a step further by allowing you to customize your own Case Analysis Reports to identify the artifacts of the user activities. You can hear more from Paul at his Extending EnCase Forensic 7: Modules and Extensions lab with Hector Carmona.

If automation of forensic examinations continues to be your focus, I suggest Examining Volume Shadow Copies - The Easy Way with Simon Key (@SimonDCKey). Simon is so brilliant and is very generous with his knowledge and skills. The Volume Shadow Copies of a hard drive are a treasure trove of artifacts. Accessing and processing them is very arduous without the VSS Examiner, a free EnScript Simon shares on the EnCase App Central store.

If you are an EnScript or EnCase-compatible product developer, you need to get your credit and compensation for your work and Stake your claim!Alfred Chung, product manager for App Central, will be working hands on with the EnCase App Central submission process; and show some exciting demos from developers and partner companies already selling apps on the store.

There are other experts in the Digital Forensics Lab, including from Passware, Raytheon Pikeworks and G-C Partners, LLC; who have prepared excellent labs on the NTFS Logfile, decryption and Enterprise-Scale Linux Memory Forensics.

The 2013 Digital Forensics Labs:All of the Digital Investigation Training You Need, with a Single Purchase

As a reminder, you can get all of your digital investigation training for the next 12 months with a single line item on your budget expenditure authorization. Between now and May 10, 2013, you will receive a free pass to CEIC 2013, valued at $1295.00 USD with every full-price Guidance Software Annual Training Passport your organization purchases. Use offer code SPRING FORWARD to qualify for this incredibly convenient and valuable offer. Sign Up Here for your Annual Training Passport and receive your free pass to attend CEIC 2013 (@CEIC_Conf #CEIC2013).

Jessica Bair
Senior Director, Curriculum Development
@jessicambair

The Road to CEIC 2013: EnCase in Action!

$
0
0
Jessica BairThe “Road to CEIC 2013” is a series of blog posts on all things CEIC, before, during, and after, from an insider’s point of view.

The final agenda for @CEIC_Conf #CEIC was just released. Some breaking news: Guidance Software will unveil and describe in-depth EnCase® Analytics, our new security intelligence product employing big data analytics. EnCase Analytics empowers customers to find and expose cyber-threats hiding behind complex relationships in the wealth of data that exists within the sum of all endpoints of an enterprise. Presentations and demonstrations about EnCase Analytics will be available throughout the conference. I have been looking forward to this big announcement for months, and I will be creating the EnCase OnDemand training for EnCase Analytics this summer.

In just a few days, the advance team members will be arriving in Orlando to start setting up the lab machines and internal network, beginning the process of transforming the Rosen Shingle Creek hotel into a digital investigation mini-city. The diversity and depth of the speaker talent and sessions are truly remarkable. One on my favorite tracks @CEIC_Conf #CEIC each year is EnCase in Action, where peers share their experiences on how EnCase made a difference. A few weeks ago, my fiancé and I had dinner with Jamey Tubbs and his wife at a Guidance Software event. I worked for Jamey in the US Army CID as a Special Agent and District Computer Crime Coordinator/Computer Forensic Examiner, and we have known each other for over a decade. Inevitably, the dinner conversation included a few "war stories," including some of our own EnCase in Action adventures. Our partners were fascinated with the experiences we shared, in how computer forensic technology affected the outcome of investigations; and in the case of Jamey’s service in Iraq, had a direct impact on the safety of our troops and success of the mission.

At their core, digital forensics, e-discovery and cybersecurity are all about working with data; and understanding that data and managing it are the keys to your success. John Lukach is an EnCase professional extraordinaire, skilled with EnCase® Forensic, EnCase® Portable, EnCase® Enterprise, EnCase® eDiscovery, EnCase® Cybersecurity, and EnScript® programming. I was very happy when he joined us a part-time instructor, and he has freely shared his work in the form of EnPacks available on EnCase® App Central, such as Low Hanging Fruit and Retention Analyzer. On Sunday evening at CEIC, John will be presenting Simple Data Assessments, the process of using EnCase products in the information governance life cycle. John will show you how to generate a myriad of EnCase reports; detailing compliance, risk, and return on investment for an enforced records-retention program.

Automation is a theme @CEIC_Conf #CEIC, woven throughout the tracks. EnCase in Action is no exception. We are all aware that Wal-Mart is the largest corporation in the world. You can imagine that size comes with a proportionally large e-discovery work load. What you may not realize is that EnCase eDiscovery is central to their successful e-discovery program. Daniel Smyth is the longest tenured consultant on the Guidance Software Professional Services (GSI PS) team, and along with Edward Erkes (GSI PS), will be presenting EnCase eDiscovery Processing Workflow with Thomas Funk of Wal-Mart. Although this ‘A-Team of E-Discovery’ will be focusing on processing, they will show how the processing step in the Electronic Discovery Reference Model can affect every other step down the line (recollect, production, archive, review, etc). They will advise you on how to refine and improve the entire process, including providing a workflow diagram you can use in EnCase eDiscovery automation.

Automation continues with cybersecurity. As I spoke about in The Road to CEIC 2013: Cyber-Threat Response: Mitigate, Reduce, Reduce!, it is essential for organizations to mitigate the risk of cyber-attacks, reduce the time delay of response and reduce the costs of damage. Learn how to automate your incident response in Integrating EnCase Cybersecurity and Third-Party Incident Response Tools to ArcSight and other SIEM Tools with Mark Morgan (GSI PS) and Matthew Keller (Worldwide Information Network Systems). Mark and Matt will demonstrate how they integrated the EnCase Cybersecurity modules, as well as third-party incident response tools (such as volatility, Regripper, PDF Parser, etc.), into the ArcSight console. This presentation will demonstrate how these tools can be launched from the ArcSight console as alerts are identified, in order to immediately respond to possible attacks. Mark and Matt will introduce a GUI Interface that allows you to learn what tools to use and when to use them. They provided a sneakpeek below.

EnCase in Action track:Just a reminder: Friday, May 10th is the deadline to receive a free pass to CEIC 2013, valued at $1295.00 USD with every full-price Guidance Software Annual Training Passport your organization purchases. Sign Up Here for your Annual Training Passport and receive your free pass to attend CEIC 2013. Use code SPRING FORWARD.

I’m going to take a quick vacation before heading to Orlando myself next week. I will see you @CEIC_Conf #CEIC!

Jessica Bair
Senior Director, Curriculum Development
@jessicambair

Viewing all 114 articles
Browse latest View live